
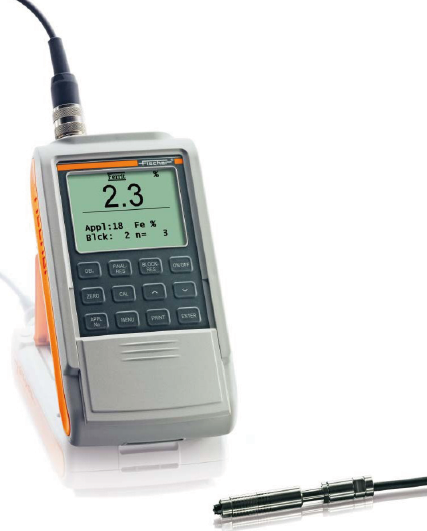
FERITSCOPE FMP30 is a standard-compatible compact instrument for non-destructive measurement of ferrite content of austenitic weld products and duplex steels. FMP30 magnetic induction method can conveniently and quickly measure the ferrite content of 0.1-80% or the ferrite number of 0.1-110FN.
Inquiry Online Sales Manager: Mr Li
FERITSCOPE measures the ferrite content in austenitic and duplex steels according to the magnetic induction method. The instrument recognizes all magnetic components, that is, in addition to delta ferrite, it also recognizes its transformed form of martensite. The instrument complies with the Basler standard and DIN32514-1 and is suitable for on-site testing. It can measure ferrite in austenitic coatings, stainless steel pipes, containers and boiler welds, and other products made from austenitic or duplex steels. content.
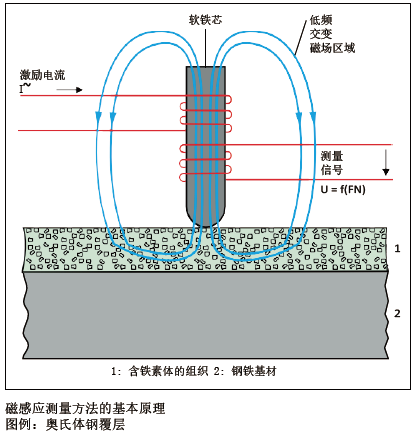
| FERITSCOPEFMP30 is measured according to the magnetic induction method. The magnetic field region generated by the coil interacts with the magnetic components within the workpiece, and the change in the magnetic field region produces an induced voltage in the second coil that is proportional to the ferrite content and then the voltage is evaluated. All magnetic components, that is to say, in addition to delta ferrite, including its transformed form martensite can be identified. The use of magnetic induction to measure ferrite content has a particular advantage. The sigma phase, Fe-Cr deposition, is formed by the fact that the ferrite content is too high and the cooling conditions are not correct, and is accurately identified as non-ferrite. On the other hand, in the metallographic section test, it is very difficult to distinguish the sigma phase from the ferrite structure, which will lead to a mis-evaluation of the ferrite content. |
|
Application examples for Ferite measuringDuplex steels are increasingly used in the chemical and petrochemical industries. For example, the boiler vessels in Figures 1 and 2 are made of duplex stainless steel with high corrosion resistance. If the ferrite content at the weld is too low, it is easily broken when subjected to tension or vibration. However, when welding duplex steels, the ferrite content at the weld is very likely to exceed the standard due to improper soldering additives or heat treatment. Only on-site testing ensures that the process does not change the ferrite content and prevents mechanical or corrosion resistance. |
 High corrosion resistance boiler made of duplex stainless steel High corrosion resistance boiler made of duplex stainless steel
|
 Measuring the ferrite content at the weld Measuring the ferrite content at the weld
|
FeritScope FMP30 Calibration / standard filmIn order to obtain comparable results, the instrument must be calibrated with a secondary standard that can be traced back to the international standard. To this end, IIW (British International Welding Association) has developed a secondary standard sheet manufactured by the British Welding Society in accordance with the DIN EN ISO 8249 standard and the ANSI/AWS A 4.2 standard. HelmutFischer provides certified calibration standards for customer calibration of the instruments, which can be traced back to the TWI secondary standard. Two units are indicated on the standard sheet: ferrite number FN and percentage content %Fe. The effect of the workpiece geometry (curvature, thickness, etc.) on the measurement can be reduced by setting a correction factor prior to shipment or by customizing a standard sheet calibration instrument. Different calibration information is stored in different applications. |
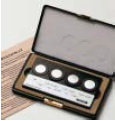 Calibration standard kit Calibration standard kit
|
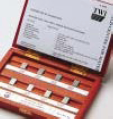 TWI Level 2 Standard Kit TWI Level 2 Standard Kit
|
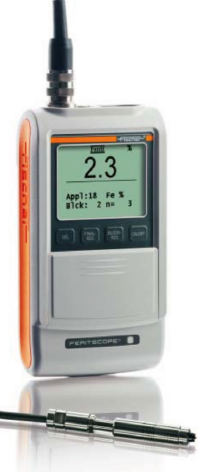 ■Non-destructive measurement of ferrite content in austenitic and duplex steels, measuring range: 0.1-110 FN or 0.1-80% Fe ■Easy operation of the instrument ■Large display, high contrast, 240x160 pixel USB interface for PC or printer ■Mechanical slide protects the buttons that are not used for measurement ■Can be measured after booting ■External trigger measurement is possible via instrument buttons or PC. ■Automatic probe recognition, there is an audible signal after the measurement is completed ■The calibration range of 0.1-90FN can be met with a single calibration. Measurement error is based on ANSI/AWSA4.2M/A4.2:1997 standard ■Standard sheets for calibration can be traced back to TWI Level 2 standard sheets, and custom-made standard sheets are also available. ■Name the application with the optional PC software MP-Name ■Battery powered or external charger (optional) |
■Adjustable instrument automatic shutdown and continuous operation time ■Button to lock/restrict operating mode ■Multiple status displays (eg warnings when battery voltage drops) ■Multi-language setting ■Measurement unit can switch WRC-FN or %Fe ■20,000 measurement data can be stored ■Can store 100 applications ■Can store 4000 data sets ■Data set with date and time stamps, statistical functions: mean, standard deviation, minimum, maximum and range ■Histogram display with Gaussian curve ■Process tolerance limits can be entered and the corresponding process capability indicators Cp and Cpk calculated ■Sound and visual warning signals are present when the upper and lower limits are exceeded ■In continuous measurement mode, the reading can also be simulated between the upper and lower limits. ■Multi-point measurements can be made in matrix measurement mode, for example: for pre-defined surface arrangements ■Average measurement mode: store only the average of multiple readings ■Area measurement mode: Store the reading and average after the probe is lifted ■Continuous measurement mode ■The odd value control automatically filters out erroneous measurements ■Can rewrite stored error readings ■Application connection mode: share zero and calibration information ■Export data to an Excel spreadsheet via the optional PC software PC-Datex ■Export data to Access via the optional PC software PC-Datacc |
| Design | Model | Order Number |

|
FGAB1.3-Fe cable length:1.5m(59“) | 604-264 |
| FGA06H-Fe cable length:1.5m(59“) | 604-303 | |

|
FGABI1.3-150-Fe cable length:1.5m(59“) L=150mm(5.9“) | 604-254 |
| FGABI1.3-260-Fe cable length:1.5m(59“) L=260mm(10.2“) | 604-341 | |

|
FGABW1.3-Fe cable length:1.5m(59“) | 604-337 |
 FERITSCOPE FMP30 Ferrite Content Tester
311,Building 5,No.81,Meiyue Road,Waigaoqiao Free Trade Zone,Pudong,Shanghai,China
amy@labgages.com
021-50473900


About LAB | Cooperative Brand | Contact us | Sitemap

沪公网安备 31011502000213号

 沪ICP备12021537号-1
©2012-2024 LAB GAGES